Redstone Lamps Explained: How They Work and What to Build
Redstone lamps are blocks that light up when powered by redstone signals, giving you complete control over dynamic lighting in your Minecraft base. Unlike torches or lanterns that burn constantly, redstone lamps respond instantly to redstone power, making them perfect for automated lighting systems, secret passages, and decorative builds. You can create anything from a simple lever-controlled entrance to complex contraptions that adjust lighting based on game conditions.
What Exactly is a Redstone Lamp?
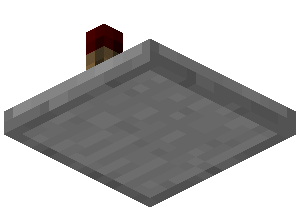
Redstone lamps are one of those blocks that seem simple on the surface but unlock tons of creative potential once you start experimenting. Here's the core mechanic: the block stays dark and non-emitting until you power it with a redstone signal, then it glows instantly at full brightness. Toggle the signal off? Darkness returns. But that simplicity is actually the whole point.
The key difference between redstone lamps and regular light sources is control. A torch burns forever. You can't turn it off. Redstone lamps respond to redstone signals. This makes them the foundation for anything automation-related in your base.
When powered, redstone lamps emit a light level of 15, which is maximum brightness in Minecraft. They're as bright as any other light source in the game, but with one massive advantage: you can turn them on and off instantly using redstone circuitry. The downside? They require redstone infrastructure to function, which means you need to understand at least basic redstone mechanics. But that complexity is where the real fun starts. Once you get it, you can build genuinely impressive systems.
Think about what this enables. Entrance halls that illuminate when you approach. Secret rooms that reveal themselves with hidden buttons. Lighting that follows the day-night cycle automatically. All of this comes from understanding how a single redstone lamp block responds to power.
Crafting and Basic Setup
Creating a redstone lamp requires four redstone dust and one glowstone block. Arrange them in a crafting table with glowstone in the center and redstone dust in the four surrounding slots. Done. You now have a redstone lamp that you can place anywhere in your base.
Glowstone comes from the Nether, which means your first redstone lamp project requires a Nether trip. If you haven't ventured there yet, prepare yourself. Bring fire resistance potions, wear full armor, and stay alert. Glowstone hangs from the ceiling in chunks, so harvest what you need and get back to the Overworld before anything catches fire.
Once you've got lamps crafted, placement is identical to placing any other block. The real work comes in powering them. You've got several options depending on what you want to build.
- Lever: The simplest option. Place it next to your lamp, run redstone dust between them, and flip the lever to toggle the lamp on and off.
- Button: Gives you momentary power. Press it and the lamp stays on for a few ticks before shutting down automatically. Useful for pulsing effects.
- Redstone dust: Connect your lamp to dust lines that receive power from other sources like repeaters, comparators, or tripwire hooks.
- Daylight detector: Powers your lamp when daylight is present, opens up automated day-night lighting systems.
- Pressure plates: Lamps turn on when something walks over a plate, perfect for motion-activated lighting.
For your absolute first redstone lamp setup, just place a lamp and a lever next to each other, connect them with redstone dust, and flip. Watch it light up. That's the core. Everything else is expanding on that foundation.
Simple Builds You Can Make in Survival
Let's talk practical. Not everyone wants to spend hours designing complex piston mechanisms. Some of us just want useful, attractive builds that don't require an engineering degree.
The Entrance Lighting System - This is where I start with every new base. Place redstone lamps above or beside your front door, run some redstone dust to a lever near your spawn point, and you've got instant control. Flip the lever and your entrance lights up. During the day it's unnecessary, but at night that glow is inviting. Plus, it looks way cleaner than having torches scattered everywhere. Your guests will notice the attention to detail.
Even better, hide the lever somewhere and add a button outside your door. Walk up, press it, and your entrance illuminates to welcome you home. Small detail, massive atmosphere improvement.
Atmospheric Interior Lighting - Here's where redstone lamps move beyond functional into genuinely beautiful. Hide lamps behind slabs, stairs, or walls inside your base. When powered, light spills out from edges, creating ambient lighting that feels warm and inviting rather than industrial.
Connect these lamps to a daylight detector and suddenly your base responds to the game world. Dawn arrives, your interior lamps fade. Dusk falls, they brighten automatically. You're looking at a comfortable interior that actually feels alive. And if you're showing off your creation to others, you'll want to look good while standing in that beautiful lighting. Create a custom Minecraft skin that matches your base's vibe before you start hosting tours.
The Secret Room Reveal - Build a bookshelf wall as your secret door. Hide lamps behind it or inside the chamber it leads to. Wire them to a hidden button somewhere in your base. Press the button and before the door even opens, the room lights up. It's cinematic, it's impressive, and it requires barely any redstone knowledge. Just patience and good wiring organization.
Outdoor Path Lighting - Use redstone lamps to light pathways between your base and other structures. Connect them to a daylight detector so they only activate at night. Suddenly you've got navigation without glitchy mobs spawning on your pathways. Add some decorative blocks around the lamps and your entire base grounds feel thought-out.
Moving to Moderately Complex Circuits
Once basic lever-switching feels boring, it's time to combine redstone lamps with actual redstone logic.
AND gates power a lamp only when two specific conditions exist simultaneously. T-flip-flops create toggles where one button press turns a lamp on, the next press turns it off. OR gates let multiple switches control the same lamp. These aren't complicated to build once you see the pattern, but they feel genuinely clever when everything works.
One surprisingly satisfying project is a "smart base lighting" system. Daylight detectors turn lamps on at dusk, off at dawn. Real talk, add a separate switch so you can override the automation when you want manual control. Suddenly your base is actually responding to the world around it.
Security lighting is another practical application. Multiple buttons throughout your base that all trigger the same lamp circuit to flash. If you've got creepers prowling nearby, one emergency press lights up your entire operation. It's useful for navigation too, especially if you're deep underground.
The real big deal happens when you combine lamps with pistons and doors. Automatic garage doors that illuminate as they open. Security gates that glow when you approach. Sliding walls that light up to reveal hidden chambers. These feel like real automation systems, not just flashy lighting.
Clock circuits are where things get satisfying. Build a repeating redstone pulse generator and you've got lamps that flash in patterns. Set the timing right and you can create pulsing effects, scrolling light displays, or even synchronized arrays. YouTube tutorials on redstone clocks can teach you this in about an hour, and the payoff is significant.
Making Your Builds Look Extraordinary
Here's something most people overlook: redstone lamps aren't just functional infrastructure. They're genuinely gorgeous when used aesthetically, and a well-lit base gets noticed. If you're showing off your work to friends or on servers, lighting separates memorable bases from forgettable ones.
Recessed lighting is your friend. Don't just slap lamps on walls. Hide them. Place lamps in the floor with glass or trapdoors in front of them so light spills outward without the block being obviously visible. Do the same with ceilings. This professional touch immediately elevates the entire space.
Color coordination matters more than people realize. Redstone lamps give off bright white light. If your base uses warm tones like oak and terracotta, that harsh white can clash if you're not careful. Use lamps selectively or pair them with warm-colored blocks nearby. In darker bases with stone and blackstone, that brightness becomes a feature rather than a problem.
Landscape lighting is completely underrated. Lamps hidden in trees illuminate the canopy from inside. Lamps beneath walkways glow softly. Lamps aimed at water features create reflection. These small details tell visitors that you actually thought about the space rather than just stuffing it with blocks.
Pulsing effects create real atmosphere. Wire separate lamp circuits to timing delays so they brighten and dim in sequence. Not enough to be obnoxious, just enough to feel alive. A nightclub vibe, a breathing rhythm, whatever aesthetic you're chasing.
If you want your builds to be truly striking, presentation matters. Browse Minecraft skins and pick one that complements your base's style. You'll spend hours in that space. Might as well look good while you're there.
Worth the Investment
Redstone lamps aren't for everyone, and that's fine. Plenty of players are happy with simple torches and call it done. But if you're interested in building systems that actually respond to your commands, in creating bases that feel intentional rather than accidental, lamps are where it starts. Begin simple with a switch. Build from there. That moment when your first automatic system works? Genuinely addictive.