5 Minecraft bouwtechnieken voor indrukwekkende bouwwerken
Introductie
De meeste spelers kennen het gevoel: je kijkt naar een flawloze Minecraft-burcht op YouTube, kijkt dan terug naar je eigen kleine dozenhuisje en zucht. De kloof voelt enorm. De waarheid is dat de makers achter die geweldige werelden geen magie doen. Ze herhalen steeds dezelfde handvol duidelijke Minecraft-bouwtechnieken keer op keer.
Verwijder shaders en fancy resource packs en goed bouwen komt altijd neer op een paar herhaalbare vaardigheden. Het gaat niet om willekeurig blokken plaatsen totdat iets "oké" eruitziet. Het gaat om planning, schaal, kleur, detail en functie die allemaal samenwerken. Het beste deel is dat iedereen deze vaardigheden kan leren, of je net begonnen bent met Survival of al sinds de vroege updates speelt.
Deze handleiding loopt door 5 Minecraft-bouwtechnieken om te beheersen voor indrukwekkende bouwwerken in 2026 waarop expertbouwers nog steeds vertrouwen, ongeacht hoeveel nieuwe blokken of features worden toegevoegd. Van de eerste schets tot het laatste stukje Redstone, houden we het duidelijk, praktisch en klaar om in je volgende wereld te gebruiken. Aan het einde heb je een set tools om eenvoudige dozen om te zetten in bouwwerken waar spelers daadwerkelijk naar stilstaan.
Belangrijkste punten
- Begin met een eenvoudig driestadig planningsproces zodat elk bouwwerk een duidelijk idee, layout en eindpunt heeft in plaats van willekeurig te groeien.
- Geef je constructies geloofwaardige frames, steunpunten en paden zodat ze aanvoelen als echte plaatsen waar je doorheen zou kunnen lopen, niet holle schalen.
- Kies een strak blokpaleta en mix texturen zodat muren er niet vlak of rommelig uitzien, zelfs als je slechts enkele blokken gebruikt.
- Balanceer detail met lege ruimte zodat je oog weet waar je eerst moet kijken in plaats van verdwaald te raken in lawaai.
- Voeg thema's, Redstone en feedback van andere spelers toe zodat je bouwwerken levend, persoonlijk en leuk om te verkennen voelen.
1. Beheers de kunst van planning en context
Het driestadig planningsproces
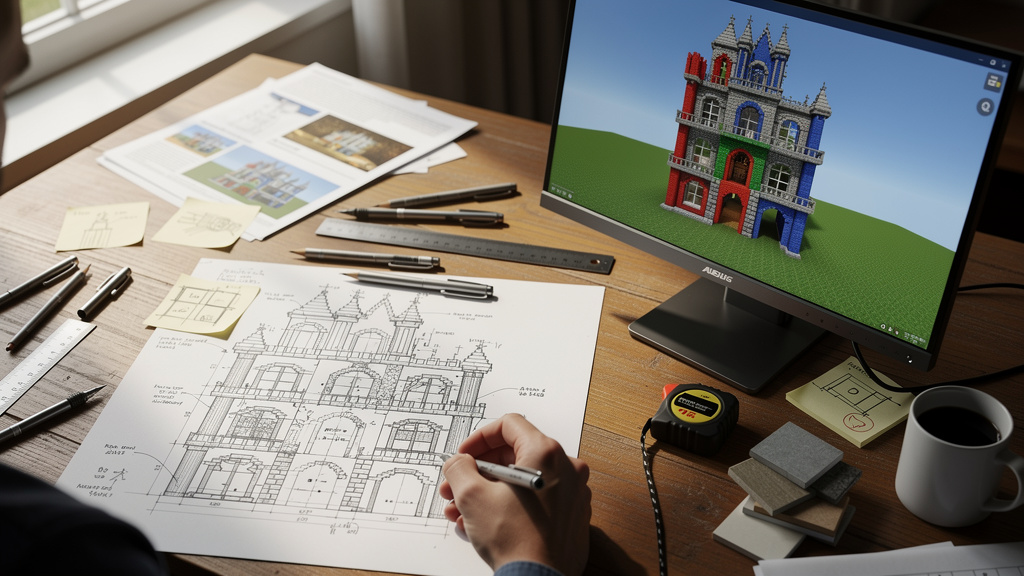
Direct beginnen met een nieuwe basis leidt meestal tot halfafgemaakte muren en vreemde kamers die je "later fixt". Sterke bouwwerken beginnen voordat het eerste blok wordt geplaatst. Een eenvoudige driestappe-methode houdt ideeën helder en projecten onder controle:
- Ruwe schets
Teken snel een bovenaanzicht of zijaanzicht op papier of in een schets-app. Het hoeft niet mooi uit te zien. Vang de basisomtrek en hoofdvormen. Voeg één twist toe aan een veelgebruikt thema (bijvoorbeeld een burcht hangend aan kettingen onder een klif, of een dorp gewikkeld rond een reusachtige boom). - Mini-model in Creative
Spring in een kleine Creative-testwereld en maak een piepkleine versie van het idee. Houd het heel compact, focus op vorm en hoogte. Test verschillende dakhoeken, torenhogte en kamerinstellingen zonder je zorgen te maken over middelen. - Draadmodel op de echte locatie
In je echte wereld, markeer het bouwwerk met goedkope blokken zoals vuil of wol. Teken de hoeken, vloeren, daken en hoofdmuren. Pas het "skelet" uit de verte aan voordat je je committeert aan volledige muren en details.
"Twee keer meten, een keer snijden." - Oud bouwersspreuwoord dat perfect in Minecraft past
Dit proces voelt klein, maar het bespaart uren aan afbreken en herbouwen later.
Het begrip van de context van je locatie
Een bouwwerk staat altijd ergens, en dat "ergens" bepaalt hoe geloofwaardig het aanvoelt. Context is het mengsel van terrein, bioom en nabijgelegen bouwwerken rond je project.
Stel jezelf een paar snelle vragen voordat je begint:
- Is het terrein vlak, heuvelachtig of op een klif?
- Is het bioom koud, warm of nat?
- Zijn er nabijgelegen bouwwerken die je in stijl of kleur moet weerspiegelen?
- Waar zouden wegen, boerderijen, dokken of een stadsplein logischerwijs heen gaan?
Voorbeelden:
- Een spar-huisje met kampvuren en mierig steen voelt goed in een donker bos.
- Een zandsteenvilla met binnenplaatsen en waterkanalen past beter in een woestijn.
- Sneeuwgebieden nodigen uit tot steile daken en schoorstenen, jungles suggereren hangende bruggen en stelhuizen.
Denken als een miniatuurbeplanner, zelfs voor slechts één huis, helpt je basis aanvoelen als onderdeel van een groter plaats in plaats van een eenzaam doosje in het niets.
2. Bouw met structureel realisme en consistente schaal
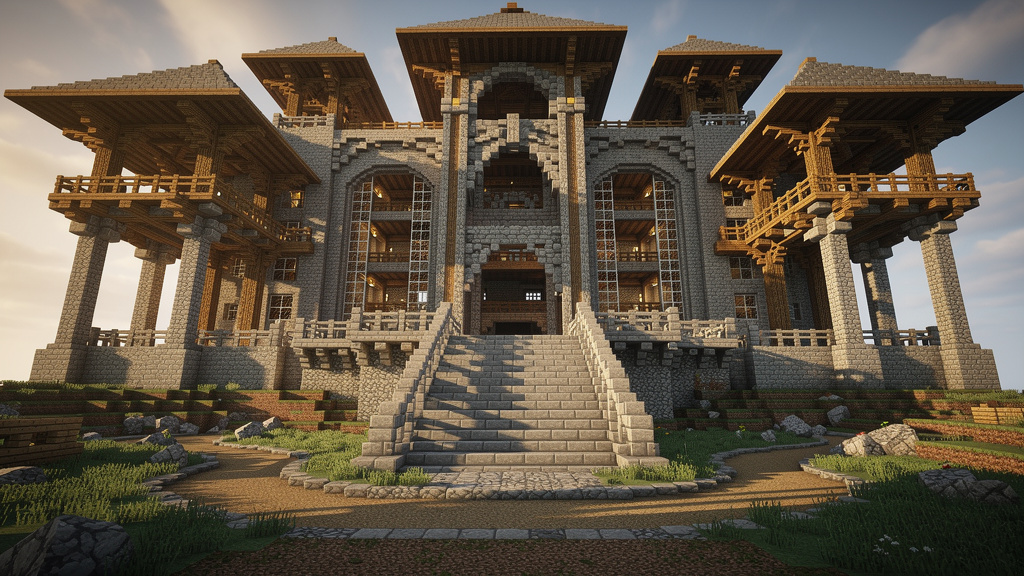
Voeg structuur en uitgang toe
Minecraft staat zwevende blokken toe, maar echte gebouwen werken niet zo, en je ogen merken het verschil. Een dak dat zonder steun hangt voelt verkeerd, zelfs als het spel het toestaat. Duidelijke structuurselementen geven je bouwwerken gewicht en realisme:
- Zet muren op korte funderingen zodat ze niet recht uit vuil groeien.
- Voeg pijlers toe onder balkons en brede daken.
- Gebruik balken en bogen om grote gaten te overbruggen en plafonds te ondersteunen.
Naast structuur, denk aan uitgang, hoe spelers door het bouwwerk bewegen:
- Plaats deuren waar een pad natuurlijk naartoe zou leiden.
- Geef trappen en ladders genoeg ruimte zodat beweging soepel aanvoelt, niet beklemd.
- Lijn vensters uit met interieurkamers zodat de buitenkant overeenkomt met de binnenkant.
Behandel je bouwwerken als bewoonde ruimtes in plaats van holle schalen en ze voelen meteen completer aan.
"Vorm volgt functie." - Louis Sullivan, architect
Laat de manier waarop spelers door je basis bewegen de layout ervan bepalen.
Een consistente schaal handhaven
Schaal is de grootte van dingen vergeleken met de speler en elkaar. Als de schaal verkeerd is, voel je het zelfs als je niet kunt uitleggen waarom.
Gebruik de lengte van de speler (twee blokken) als je basisregel:
- Normale deuren: 2-3 blokken hoog (3 voor grandioze ingangen).
- Plafonds: minimaal 3 blokken boven de vloer voor comfortabele kamers.
- Trappen: lang genoeg zodat je niet bij elke stap je hoofd stoot.
- Vensters en meubilair: in een formaat dat overeenkomt met de kamer.
Veelvoorkomende problemen zijn reuzenvensters op kleine huizen of piepkleine vensters verspreid op enorme muren. Stap af en toe terug en vraag jezelf af: Ziet deze plaats eruit alsof die gebouwd is voor dezelfde grootte persoon? Als het antwoord ja is, voelt het hele bouwwerk kalmer en geloofwaardiger aan.
Gereedschap gebruiken voor complexe vormen
Sommige vormen zijn lastig om uit het oog te volgen, zoals koepels, bollen en vloeiende curves. Eenvoudig extern gereedschap kan de wiskunde voor je doen zodat je je op ontwerp kunt concentreren. Gebruik onze Minecraft tools om te helpen met planning en genereren.
- Kies de vorm en grootte die je wilt.
- Volg elke laag in-game, ring voor ring.
- Zodra de kernvorm klaar is, pas je het aan met je eigen stijl.
3. Ontwikkel een geavanceerd kleuren- en materiaalpaleta
De kracht van een beperkt en samenhangend paleta
Blokselectie is waar veel bouwwerken mislopen. Elk helder blok in het menu pakken leidt tot een lawaaierig "regenboog-rommeltje". Vakkundige bouwers werken met een klein samenhangend blokpaleta, vooral bij huizen en kleinere structuren.
Voor een starterbasis, streef naar 4-5 hoofdblokken:
- Frameblok - gesloten stammen of steenbaksteen pijlers.
- Muurblok - wit beton, terracotta of primair hout.
- Detailblokken (1-2) - trappen, platen en accenten voor vensters en beplating.
- Dakblok - meestal donkerder om op te vallen tegen de muren.
Leg je gekozen blokken naast elkaar op de grond en controleer ze overdag en 's nachts:
- Strijden de kleuren, of zitten ze kalm bij elkaar?
- Wil je een zachte, laag contrast blik of een paar sterke accenten?
Op grotere bases, voeg meer blokken alleen toe als elk een duidelijk doel heeft. Zelfs een piepklein huisje met een vijfblok-paleta kan schoon en gepolijst eruitzien.
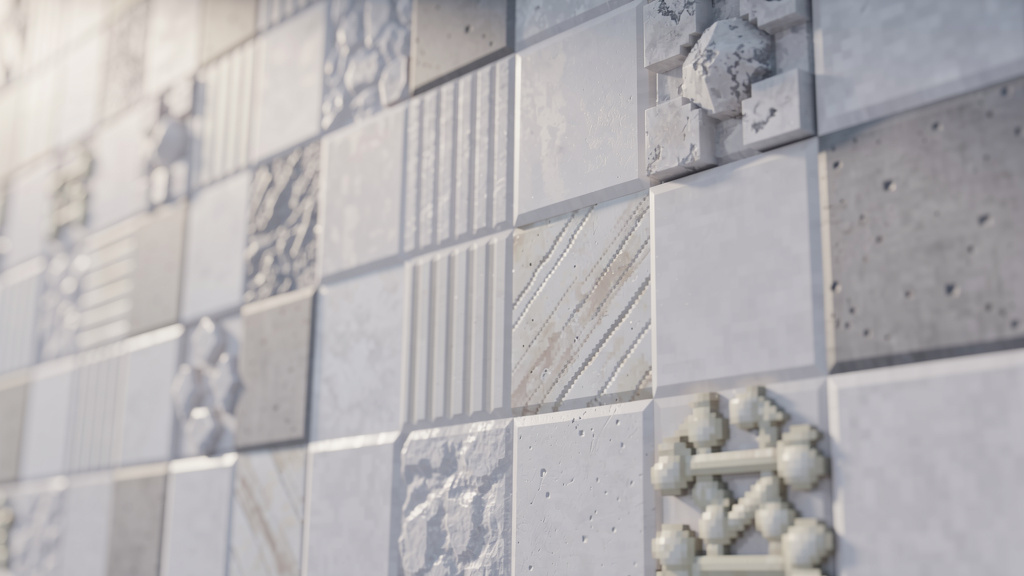
De kunst van textuurmixing
Een enorme platte muur gemaakt van één blok voelt saai, zelfs met een goed paleta. Textuurmixing lost dat op door gelijkaardige kleuren met verschillende oppervlakken te mengen, diepte toe te voegen zonder de hoofdkleur te veranderen.
Bijvoorbeeld:
- Voor witte muren, mix kwarts, wit beton, kalksteen, beenblokken en een beetje witte wol.
- Voor stenen constructies, begin met stenen bakstenen, strooi dan steen, keisteen, andesiet en een paar gescheurde of mierige blokken in de buurt van de grond.
Tips:
- Gebruik één dominant blok, meng dan de anderen licht in.
- Bouw in kleine patches of verspreide plekken, niet overal gelijkmatig.
- Stap altijd terug en controleer de muur zowel van dichtbij als van ver weg.
4. Balanceer ingewikkelde details met lege ruimte
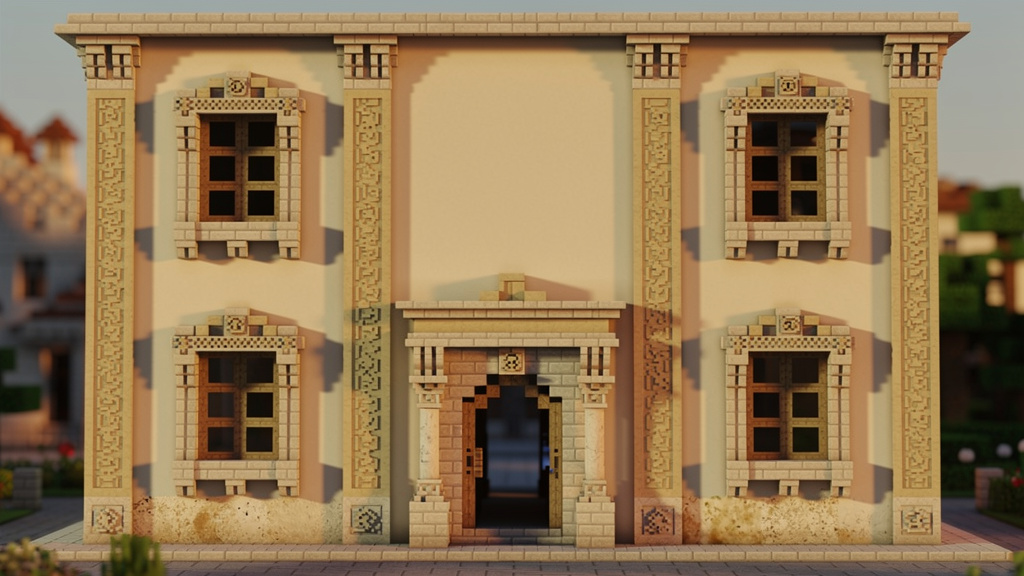
Het overdrive-detail-voorkomen-principe
Zodra je trappen, platen, luiken en hekken ontdekt, is het verleidelijk om elk blok ermee af te dekken. In het begin ziet het indrukwekkend uit, maar van verre mengen alles in één lawaaierig oppervlak. Dat is de overdetail-val.
Een eenvoudige regel: details moeten de hoofdvorm ondersteunen, niet vervangen.
Gebruik details voor:
- Vensterlijsten en luiken
- Dakranden en balken
- Steunpunten, bogen en sleutelafbouwing
Vermijd:
- Volledige muren van top tot onderkant bedekken met willekeurige stukken
- Stukken toevoegen omdat een ruimte "leeg" eruitziet
Voordat je detail toevoegt, vraag jezelf af: Maakt dit de structuur duidelijker, of vult het alleen ruimte? Als het alleen ruimte vult, laat die geboorteplaats eenvoudiger.
De belangrijke rol van lege ruimte
Lege ruimte is het kalme, lege deel van een ontwerp, gewone muren, gladde pijlers, eenvoudige daaksecties. Deze rustige gebieden zijn net zo belangrijk als de mooie delen omdat ze je oog een plaats geven om uit te rusten.
- Een uitgesneden boog boven een gewone ingang valt op.
- Verfijnde vensterlijsten op een gladde muur zien er scherp uit.
- Een paar verfraaide pijlers op een eenvoudige voorgevel voelen sterker dan tientallen drukke vormen.
"Minder is meer." - Ludwig Mies van der Rohe
Denk aan lege ruimte als de pauze tussen noten in muziek. Zonder het is er geen ritme. Delen van je bouwwerk eenvoudig houden is geen luiheid, het is vertrouwen in je hoofdvormen.
Duidelijkheid op afstand bereiken
Een snelle test laat zien of je detailniveau werkt:
- Stap 20-30 blokken terug of maak een screenshot.
- Vraag jezelf af: Kun je de hoofdvormen duidelijk zien - torens, daken, ingangen? Lezen deuren en vensters in één blik?
Als alles in één druk patroon vermeldt, begin dan details weg te nemen totdat de structuur weer leesbaar aanvoelt. Schone silhouetten worden bijna altijd beter bewaard dan hypergedetailleerde.
5. Voeg creativiteit en functionaliteit toe aan je ontwerpen
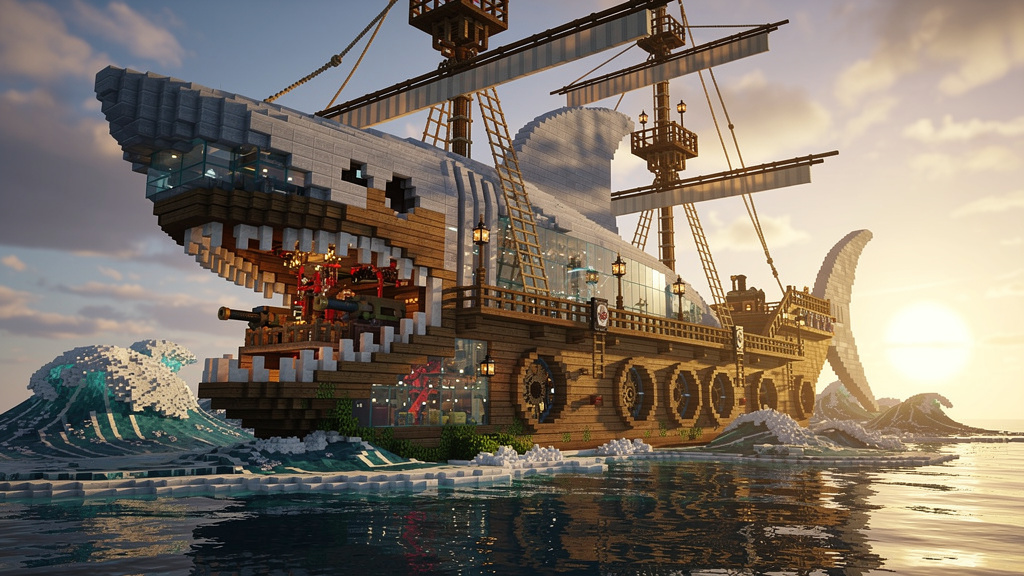
Ga voorbij conventionele thema's
Middeleeuwse dorpen, piratenSchepen en fantastische kastelen zijn om goede redenen populair, maar ze zijn ook overal. Om op te vallen, houd de klassieke basisidee vast en voeg een onvergetelijke twist toe.
Probeer ideeën als:
- Een piratenSchip gewikkeld in de vorm van een reusachtige haai
- Een woestijnvesting halfbegraven in zand, met alleen bovenste torens zichtbaar
- Een futuristische basis gebouwd binnen de schaal van een oude ruïne
- Een dorp hangend aan kettingen onder een zwevend eiland
Deze twists hoeven niet gigantisch te zijn. Zelfs huizen bouwen in reusachtige paddestoelen in plaats van bomen kan je wereld zijn eigen smaak geven. De sleutel is om elk groot project een eenvoudige "hook" te geven waar mensen aan denken.
Onconventionele inspiratie vinden
Als je alleen naar andere Minecraft-bouwwerken kijkt, herhaal je vaak dezelfde patronen. Frisse ideeën komen van buiten het spel:
- Films en tv-shows (stadsstelsels, Schepen, ruimtestations)
- Conceptkunst en strips (kleurschema's en stemming)
- Real-world architectuur en reisfoto's
- Verhalen, mythen en gedichten (thema's en vormen)
Sommige bouwers ontwerpen hele projecten rond één kunstwerk of kort verhaal, transformeren scènes en emoties in blokken en vormen. Als je bouwwerken uit veel bronnen putten, begint je werelden naar binnen verhalen te voelen.
Redstone integreren voor interactieve bouwwerken
Looks zijn slechts half van een geweldige basis. Redstone voegt beweging en verrassing toe, laat bouwwerken aanvoelen als levend. Je hebt geen reusachtige boerderijen nodig voor dat effect, kleine circuits doen veel.
Eenvoudige ideeën:
- Geheime ingangen: Zuigerduren verborgen achter schilderijen of boekenkasten, vloeren die opengaan in verborgen kamers
- Dagelijkse helpers: Harnas-wissels in de buurt van je voordeur, kleine boerderijen voor papier, voedsel of stokken onder de basis
- Slim licht en reizen: Redstone-lampen gekoppeld aan daglichtensoren, slime-lanceerders of andere snelle reisroutes tussen torens en wijken
Als uiterlijk en functie elkaar ondersteunen, voelt je basis als een echt thuis, niet alleen een mooie screenshot.
De samenwerkingsgeest en feedback zoeken
Geen bouwer verbetert snel door in een bubbel te werken. De Minecraft-bouwscène leeft van gedeelde ideeën, wereldtours en eerlijke feedback.
Manieren om daarvan gebruik te maken:
- Sluit je aan bij bouwgericht Minecraft-servers en groepsprojecten.
- Post screenshots en vraag om specifieke feedback ("Is deze dakhogte oké?").
- Kijk hoe andere spelers hun bouwwerken vormen, detailleren en herzien.
"Als ik verder gekeken heb, is het door op de schouders van reuzen te staan." - Isaac Newton
Conclusie
Geweldige Minecraft-bouwwerken vertrouwen niet op geheime trucs. Ze komen voort uit consistent gebruik van een paar solide bouwgewoonten. De 5 Minecraft-bouwtechnieken om te beheersen voor indrukwekkende bouwwerken in 2026 beslaan dat volledige pad: plan je bouwwerken, respecteer de locatie, geef ze sterke structuur, kies slimme paleta's, controleer detail en voeg verhaal en functie toe.
Deze ideeën worden dagelijks gebruikt door bouwers die indrukwekkende steden, avonturenpas en showcase-bases creëren. Je hoeft niet alles tegelijk toe te passen. Kies één gebied, misschien planning of je blokpaleta, en focus daar op je volgende project. Zelfs kleine veranderingen, zoals een duidelijkere schets of betere ondersteuning, kunnen een enorm verschil maken.
Houd je volgende bouwwerk in gedachte, kies één techniek uit deze lijst en pas die opzettelijk toe. Voeg dan nog een toe op het project daarna. Stap voor stap worden die eenvoudige dozen tot bouwwerken waar mensen aan denken.
Veelgestelde vragen
Hoe lang duurt het om een bouwwerk te plannen met het driestadig planningsproces?
Het hangt af van projectgrootte, maar het is meestal korter dan het klinkt:
- Ruwe schets: 15-30 minuten
- Mini-model in Creative: ongeveer 30 minuten
- Draadmodel op de echte locatie: 30 minuten voor een klein huisje, tot een paar uur voor een grote basis
Deze tijd bespaart je bijna altijd meer tijd door grote herbouwen te voorkomen. Met oefening wordt elke fase sneller en wordt het een natuurlijk onderdeel van elk project.
Wat is de beste manier om textuurmixing te oefenen zonder middelen te verspillen?
Gebruik Creative-modus als je trainingsgrond:
- Bouw kleine 10x10 testmuren en probeer verschillende mixen in elk.
- Maak schermafbeeldingen van combinaties die je leuk vindt en houd ze als referentie.
- Veel bouwers houden een apart "paleta-wereld" gevuld met testmuren en vloeren.
Zodra je een mix vindt die goed eruitziet van dichtbij en van ver weg, kopieer je datzelfde patroon in Survival.
Hoe weet ik of ik mijn bouwwerk te veel detail geef?
Staan ongeveer 20-30 blokken verder zodat het hele bouwwerk in het scherm past. Als je deuren, vensters en daklijnen niet duidelijk kunt onderscheiden, heb je waarschijnlijk te veel detail.
Andere snelle controles:
- Vraag een vriend naar een snelle eerste indruk.
- Vergelijk je screenshots met bouwers die je bewondert en zie hoeveel gewone muur zij laten.
Moet ik Redstone kennen om indrukwekkende bouwwerken te creëren?
Nee. Veel indrukwekkende kastelen, dorpen en Schepen gebruiken helemaal geen Redstone en zien er nog steeds verbazingwekkend uit dankzij sterke vormen, schaal en paleta's. Redstone gaat vooral over functie en interactie, niet ruwe looks.
Voor de meeste spelers heeft het zin om te leren: eerst basisplanning en vorm, dan schaal en paleta's, en ten slotte eenvoudige Redstone-circuits (verborgen deuren, verlichting, kleine boerderijen).
Wat moet ik doen als mijn bouwwerk dichtbij goed eruitziet maar van ver weg saai is?
Als een bouwwerk van dichtbij goed eruitziet maar van ver weg saai is, ligt het probleem meestal in de silhouet, de omtrek van het bouwwerk.
Om het op te lossen, probeer:
- Hoogteveranderingen toe te voegen: torens, schoorstenen of verheven secties
- Het dak in meerdere niveaus of hoeken te verdelen
- Grotere vormen toevoegen zoals balkons, overstekken of grote steunpunten
- Sterkere contrast gebruiken tussen grote gebieden (bijvoorbeeld een donkerder dak op lichtere muren)
Denk aan wat een ander speler ziet als hij naar je basis toeloopt. Als de grote vorm interessant is, willen ze dichterbij komen en alle kleine details opmerken die je toevoegde.
Lead writer at minecraft.how. Long-time Minecraft player running a small SMP server, testing every build, mod, and seed before writing about it.