Cea Mai Ușoară Fermă Minecraft XP: Ghid Redstone 2026
Introducere
A-ți mânui o sabie o noapte Minecraft în plus doar ca să ajungi la nivelul 30 se poate simți etern. Pierde acele niveluri dintr-o Creeper ghinionistă și toată acea vreme se-a dus. Exact acea frustrare este motivul pentru care am creat Cea Mai Ușoară Fermă Automată Minecraft XP: Ghid Redstone 2026 din start.
Fermele XP automate răstoarnă acea agonie. În loc să gonești după mobs, mobii vin la tine. Cu setupul corect, poți sta în picioare, să fii AFK, și să-ți vezi orburile verzi veniind în timp ce-ți faci treburile din viața reală. Niciun creier Redstone avansat necesar, niciun zid de abilități tehnice de cărări.
În acest ghid, parcurgem două dintre cele mai ușoare ferme XP automate care funcționează cu mecanica Bedrock din 2026:
- O fermă de aur și XP Portal Nether care produce atât XP, cât și aur fără niciun spawner.
- O fermă XP compact Spawner de Infestare care te-n topește prin niveluri odată ce găsești un altar sau o mină abandonată.
Ambele construcții folosesc Redstone simplu și modele clare pe care începătorii și jucătorii care se-ntorc pot să le urmeze.
Puncte Cheie
- Înveți două design-uri de ferme XP automate ușoare pentru începători, care folosesc Redstone foarte simplu. Unul folosește portale Nether pentru Piglins și aur, celălalt o face pe un spawner obișnuit cu ajutorul Poțiunii de Infestare.
- Obții liste complete de materiale pentru fiecare fermă înainte să pui primul bloc.
- Urmărești ghiduri pas cu pas pentru fiecare fază majoră.
- Vezi cum să-ți accelerezi fiecare fermă cu poziții AFK inteligente și spawn-proof-ing.
- Acumulezi obiceiuri de siguranță și sfaturi de planificare care te ajută cu fiecare proiect de automatizare viitor.
De Ce Să Construiești O Fermă XP Automată?
Punctele de experiență alimentează aproape fiecare parte de nivel înalt din Minecraft. Ai nevoie de XP pentru:
- A încânta unelte, armură și arme.
- A repara echipamentul pe o nicovală.
- A ține obiecte cu Mending în viață pentru totdeauna.
Fără o sursă constantă de XP, încântări puternice cum ar fi Fortune III, Unbreaking III, și Looting III par inaccessibile sau iau ore de vânătoare plictisitoare de mobs.
Cu o fermă automată, poți sta AFK în timp ce-ți urmărești un videoclip, vorbești cu prietenii, sau plănuiești următorul tău proiect mare.
Cel mai mult, o fermă XP accelerează toată progresiunea lumii tale. Încântări rapide înseamnă mai mult minat rapid și cules de resurse, mai mult schimb cu sătenii, și mai mult setup de beacon-uri. O singură fermă XP automată bună continue să-ți dea roade de fiecare dată când te conectezi.
Înțelegerea Bazelor Fermei XP: Cum Funcționează De Fapt
Înainte de a stiva blocuri sus în cer, ar trebui să înțelegem ce face o fermă XP să funcționeze. Fiecare fermă automată, indiferent cât de sofisticată, urmează același model simplu.
"Fiecare fermă de mobs din Minecraft se reduce la patru pași: spawn, mișcare, ucidere, colectare." - zicală Redstone comună
Fiecare fermă XP are patru părți cheie:
- Zona de spawn - unde jocul creează mobs într-un spațiu controlat.
- Transport de mobs - cum muți acei mobs către un singur punct mic.
- Metodă de ucidere - cum mor mobii în felul care dă XP și dropuri.
- Sistem de colectare - cum sunt strânse articolele și cum stai tu pentru a obține orburile XP.
Spawnul de mobs urmează reguli stricte. Mobii ostili apar în zone întunecate într-o anumită distanță de jucător, de obicei între aproximativ 24 și 128 de blocuri. Jocul are, de asemenea, un mob cap, ceea ce înseamnă că doar un număr limitat de mobs ostili pot exista lângă tine odată.
Metodele de ucidere împart fermele în semi-automate și complet automate:
- Design-urile semi-automate scad mobii suficient cât să supraviețuiască cu viață mică, iar tu ii termini cu o lovitură pentru XP.
- Design-urile automate, cum ar fi ucigașul cu trident Bedrock pe care-l folosim aici, mișcă un trident aruncat în jurul cu pistonii, deci jocul numără în continuare dauna ca lovitură de jucător.
Materiale Esențiale Și Pregătire Înainte De Construcție
Nimic nu omoară motivația mai repede decât a cobori dintr-o fermă pe jumătate construită pentru că ai uitat hoppers din nou. Putem evita asta cu o simplă listă master și puțin prep în lume înainte să pui primul bloc.
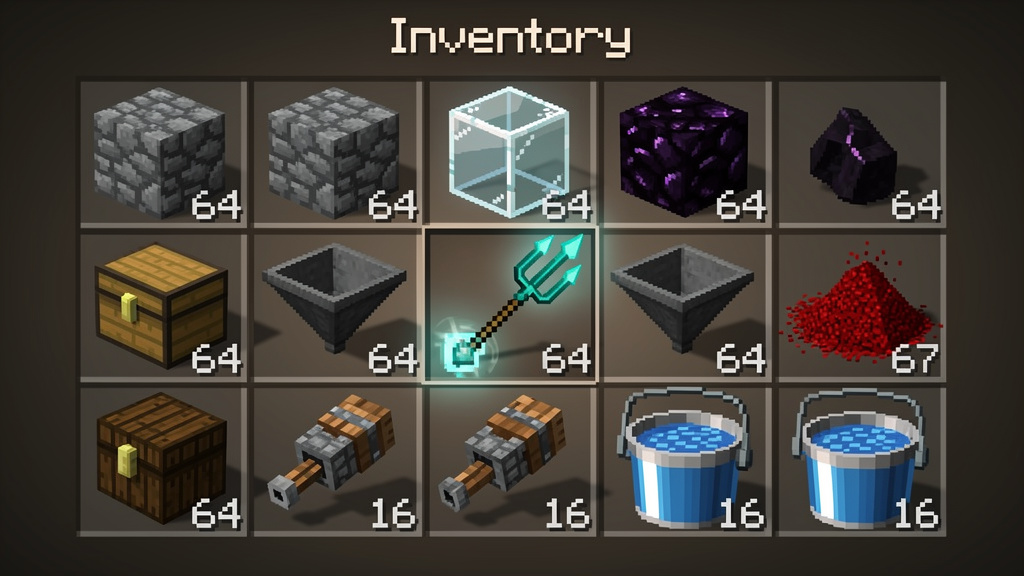
Obiecte de construcție principale:
- Blocuri solide, piatră, cărămizi de piatră sau similar
- Sticlă, pentru ferestre de vizualizare sigure
- Găleți cu apă
- Lavă, pentru iluminarea portalelor din Nether
- Scări sau schelării
- Mulți torți
Articole legate de Redstone:
- Praf de Redstone
- Câțiva pistoni
- Observatori
- Cel puțin o pârghie
- Hoppers
- Lăzi pentru sistemul tău de colectare
Articole specifice fermei:
- Fermă Portal Nether cu Aur și XP: Multă obsidian, piatră focului și oțel, clapete, cel puțin un trident
- Fermă XP Spawner de Infestare: Suport de fiertură și praf de Blaze, mărgele Nether, ochi de păianjen și praf de pușcă pentru versiuni splash, blocuri de piatră obișnuită, cărămizi de piatră infestată, cel puțin o Poțiune de Infestare
Câțiva pași de pregătire ușoară salvează mult timp mai târziu: curață o zonă de construcție sigură, iluminează peșteri lângă plasa ta AFK planificată pentru a crește ratele de spawn, și ține blocuri suplimentare lângă sit.
Design Fermei #1: Fermă Portal Nether cu Aur și XP
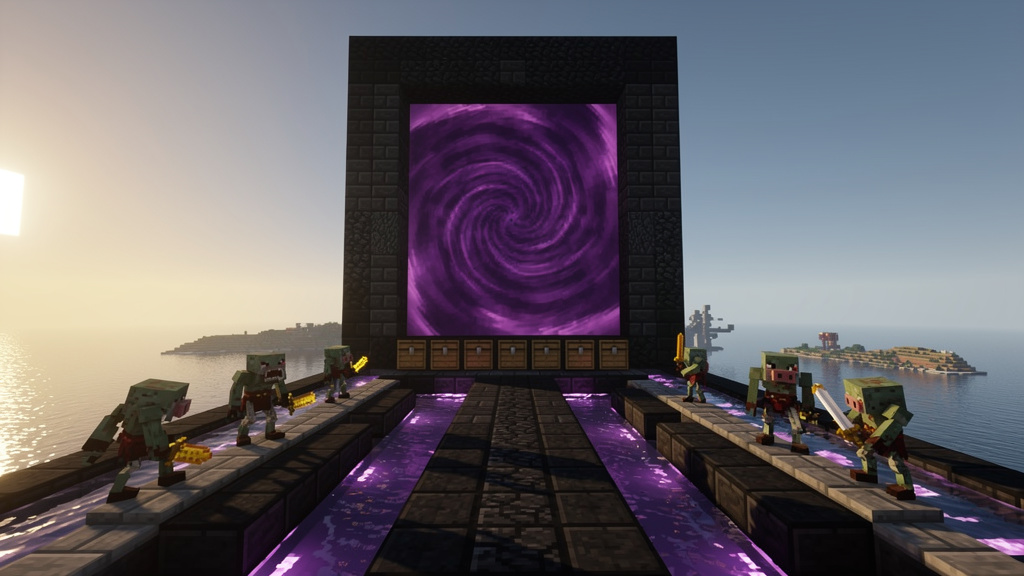
Dacă ar trebui să alegem o singură fermă XP de început pentru jucătorii Bedrock, aceasta fermă Portal Nether cu Aur și XP ar fi ea. Nu se bazează pe un spawner rar, te hrănește cu XP și aur, și se scalează bine odată ce înțelegi bazele.
Ideea este simplă:
- Construiește un portal Nether uriaș sus în cer.
- Folosește un ceas Redstone pentru a aprinde și stinge portalul pe rând.
- Lasă Zombi Piglin-i să se spawneaze din cadrul portalului.
- Folosește clarete și curente de apă pentru a-i trimite în jos o chuie într-o cameră de ucidere mică unde ucigașul cu trident face munca.
Locația contează pentru această fermă. Construirea în jurul nivelului Y 150 sau mai sus deasupra unui ocean funcționează foarte bine, deoarece sunt mai puține peșteri care fură spawnurile.
Ghid Pas Cu Pas Pentru Construcție
- Construiește podeaua de colectare: Pune cel puțin două lăzi duble cu fața la nord, una lângă alta. În spatele fiecărei lăzi, pune o linie de hoppers care alimentează mușchiurile lăzii. Deasupra acelor linii, formează un pătrat de 2x2 din hoppers care toate alimentează în jos în liniile.
- Creează schimbul ucigașului cu trident: Pune patru blocuri solide direct deasupra pătratului hopper 2x2. În jurul acelui pătrat, construiește un zid de doi blocuri înalt. Lasă o spațiere de un bloc la nivelul ochilor pentru a vedea și colecta XP.
- Construiește tubul de cădere: De la stratul superior al pereților camerei de ucidere, construiește un tub solid direct în sus aproximativ 22 de blocuri. Ține interiorul 2x2 lat.
- Adaugă platforma portalului: La vârful tubului, construiește o platformă care se extinde cel puțin cinci blocuri. Pe partea de nord, construiește un mare cadru de portal Nether, de exemplu 23 blocuri larg și 23 blocuri înalt.
- Firul sistemului de fluturat al portalului: Pe blocul din stânga jos al cadrului portalului, pune un dispenser cu fața la est în cadru cu o găleată de apă în interior. Deasupra laturii opuse, pune o sursă de lavă deci când portalul este gol, lava curgea și iluminează din nou portalul.
- Adaugă ceasul Redstone: În spatele dispenser-ului, pune doi observatori cu fața unul la celălalt pentru a forma un ceas simplu. Adaugă o pârghie deci poți să-l pornești și să-l oprești.
- Ghidează Piglins în tubul de cădere: De-a lungul marginii de jos din interior a portalului, adaugă clarete și pune-le pe deschis. Folosește scurte canale de apă dacă e nevoie pentru a-i împinge pe Piglins către gaura de cădere.
- Transformă camera de ucidere într-un ucigaș cu trident: Înlocuiește patru blocuri solide cu patru pistoni care toate au fața în sensul acelor de ceasornic în jurul pătratului. Construiește o buclă Redstone deci toți patru pistoni se ciclează în ordine.
- Armează ucigașul cu trident: Stai în mijlocul pistonilor, uită-te la jumătatea de jos a unui piston, și aruncă un trident deci să aterizeze între ei. Pornește bucla Redstone și privește tridentul alunecă într-un cerc strâns.
Operarea Fermei Tale cu Portal și Mersul AFK
Odată ce fermă este construită, folosirea zilnică este simplă:
- Stai pe latura camerei de ucidere unde ai lăsat golul de vizualizare.
- Mănâncă până barma foamei este plină deci poți să te vindeci dacă ceva merge rău.
- Pornește ucigașul cu trident mai întâi deci să-și înceapă rotirea tridentul.
- Apasă pârghia pentru ceasul portalului deci dispenser-ul să-și înceapă ciclarea apei.
Dacă ții o sabie cu Looting III în mână în timp ce mori, jocul aplică acea încântare la ucideri cu trident, deci câștigi aur și carne putredă suplimentare.
Pentru siguranță, construiește o cutie mică în jurul locului tău AFK deci fantomele rătăcitoare sau mobii străini nu pot să te atingă.
Design Fermei #2: Fermă XP Spawner de Infestare
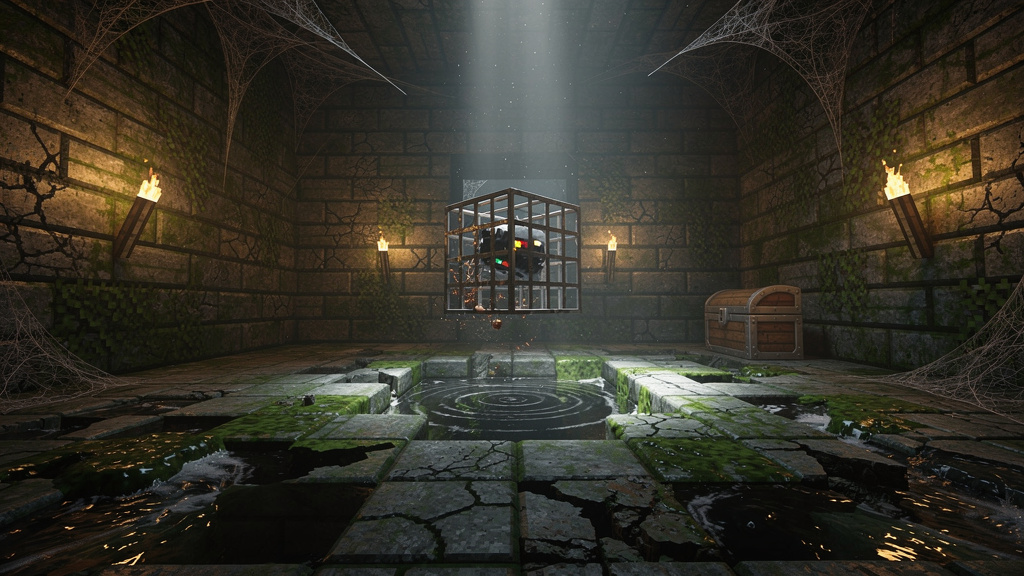
Al doilea design strălucește când deja ai un spawner de mobs într-un altar sau o mină abandonată. Pe cont propriu, un spawner dă XP constant, dar îl putem împinge mult mai departe cu Poțiunea de Infestare și puțin setup inteligent de cameră.
Folosim un spawner ostil obișnuit, ca unul cu zombie sau schelet, și-i înconjoară camera cu cărămizi de piatră infestate. Când mobii se adună la fund cu chuia de cădere, îi stropiți cu Poțiunea de Infestare. Pe măsură ce mor, pot genera Argintii care cheamă mai mulți Argintii din blocurile infestare.
Fierberea Poțiunii de Infestare
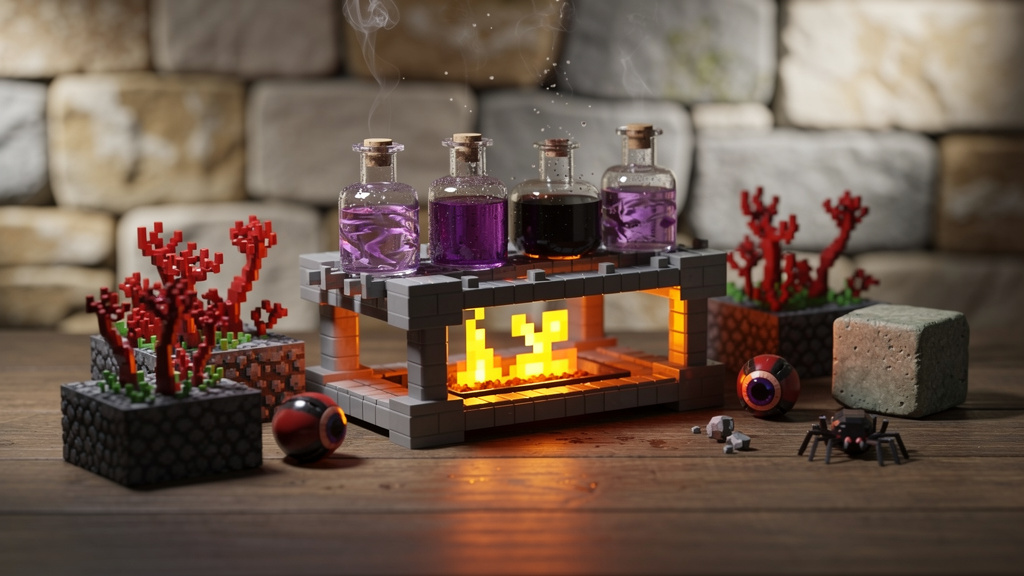
Adună echipamentul de fierbere: un suport de fierbere, praf de Blaze pentru combustibil, cel puțin trei sticle de sticlă cu apă, mărgele Nether, blocuri de piatră obișnuită, și un ochi de păianjen, și praf de pușcă pentru versiuni splash.
- Pune suportul de fierbere și adaugă praf de Blaze pentru combustibil.
- Pune trei sticle cu apă în sloturile de jos și mărgele Nether în slotul de sus.
- Așteaptă până toate trei sticlele se transformă în Poțiuni Stâncoase.
- Pune un bloc obișnuit de piatră în slotul de sus pentru a crea Poțiuni de Săpare în Piatră.
- Adaugă un ochi de păianjen pentru a le converti în Poțiuni de Infestare.
- Adaugă praf de pușcă pentru versiuni splash.
Construirea Fermei XP Spawner
- Asigură camera spawner: Pune torți pe fiecare parte a spawnerului pentru a opri spawnurile în timp ce lucrezi.
- Modelează camera: Săpă camera deci măsoară 9x9 blocuri cu spawnerul plutind în centru. Lasă cel puțin patru blocuri de aer deasupra și trei dedesubt.
- Adaugă blocuri infestare: Înlocuiește podeaua și niște straturi de perete inferior cu cărămizi de piatră infestate.
- Instalează pâlnia de apă: În fiecare colț, pune o sursă de apă un bloc deasupra podelei. Modelează podeaua deci toată apa împinge mobii spre un singur gol central.
- Săpă chuia de cădere: Săpă drept în jos aproximativ 22 de blocuri. La fund, construiește o mică cameră cu jumătăți de plăci la nivelul ochilor.
- Construiește sistemul de colectare: Sub blocul de aterizare, construiește un pătrat de 2x2 din hoppers alimentând în lăzi.
- Activează ferma: Îndepărtează torții, așteaptă ca mobii să se adune, apoi aruncă o Poțiune de Infestare splash la ei.
Compararea Ambelor Ferme: Care Ar Trebui Să Construiești Mai Întâi?
Fermă Portal Nether cu Aur și XP:
- Necesită mai multă obsidian și o construcție mai înaltă
- Nu necesită nicio structură specială în lume
- Dă XP constant plus grămezi de aur pentru schimbul Piglin și morcovi aurii
- Se scalează frumos când adaugi portale suplimentare
Fermă XP Spawner de Infestare:
- Mai ieftin pe materiale și iau mai puțin spațiu
- Folosește în principal piatră, niște Redstone, cărămizi infestare, și puține poțiuni
- Limitat de spawnerul însuși - niciun spawner înseamnă nicio fermă deocamdată
- Foarte puternic ca compactă, târzie-joc XP grinder odată setup
Pentru lumi devreme la mid-joc, mulți jucători construiesc mai întâi ferma de portal. Odată ce găsești un spawner bun, poți adăuga ferma de Infestare ca o stație pură XP.
Optimizarea Fermei Tale XP Pentru Eficiență Maximă
"Dacă ferma ta se simte încet, șansele sunt că mob cap-ul tău este plin undeva altundeva." - regulă obișnuită de farming în comunitate
Optimizări cheie:
- Spawn proofing: Iluminează peșteri în aproximativ 128 de blocuri din punctul tău AFK.
- Poziție AFK: Stai cel puțin 24 de blocuri din podeaua de spawn principală, dar nu mai departe de 128 de blocuri.
- Aspect chunk: Ține zonele principale de spawn și ucidere în chunk-uri încărcate.
- Gestionare plăcintă: Adaugă un simplu item sorter sub ferme cu ieșire mare.
Rezolvarea Problemelor Obișnuite Ale Fermei XP
Dacă mobii nu se spawneează deloc:
- Asigură-te că dificultatea este cel puțin Ușor, Pacea dezactivează mobii ostili
- Verifică sursele de lumină rătăcitoare în camera spawnerului sau cadrul portalului
Dacă spawnurile par lente:
- Ține minte mob cap-uri și distanța jucătorului
- Iluminează peșteri și spații deschise din apropiere
Dacă articolele nu ajung la lădițe:
- Verifică direcțiile hopperului, fiecare nozzlă hopper trebuie să întrebe în alt hopper sau o ladă
Dacă ucigașul cu trident nu rănește mobii:
- Verifică că toți patru pistoni se declanșează în secvență și prafdul Redstone se conectează corect
- Încearcă din nou aruncând tridentul la jumătatea de jos a unui piston
Sfaturi de Siguranță Și Practici Bune
- În timpul construcției, ține numai ce-ți trebuie pentru faza curentă
- Lasă unelte și armuri de rezervă într-o ladă lângă locul construcției
- Folosește schelării, scări, sau căderi de apă când lucrezi pe platforme înalte
- Testează piese ale fermei una câte una
- Creează tuneluri de intrare și ieșire sigure la fermele tale
Dincolo de Bazele: Extinderea Imperiului Tău de Automatizare
Odată ce ți-ți termini prima fermă XP automată, ceva se face clic. Același Redstone care alimentează un ucigaș cu trident sau ceas de portal, alimentează și multe ferme de resurse simple.
"Începe cu o singură fermă simplă. Restul construcțiilor tale de automatizare se construiesc pe acea fundație." - constructori de supraviețuire peste tot
Proiecte ușoare următoare:
- Ferme de trestie de zahăr: Plantează un rând de-a lungul apei, pune pistoni în spate cu observatori deci detectează creștere
- Ferme de bambus: Funcționează similar și furnizează combustibil fără sfârşit sau bețe pentru schimb
Cauți mai multe instrumente Minecraft pentru a te ajuta cu construcțiile tale? Sau dorești să găsești servere Minecraft active pentru a-ți arăta fermele?
Concluzie
Am parcurs două dintre cele mai ușoare moduri să oprești meciurile de mobs și să-ți încpe XP constant pe Bedrock în 2026:
- Ferma Portal Nether cu Aur și XP, care strălucește când dorești XP plus grămezi de aur și nu ai un spawner.
- Fermă XP Spawner de Infestare, care ia un altar simplu și îl transformă într-o compactă fabrică de niveluri odată ce fierzi câteva poțiuni cheie.
Construirea oricărei ferme ia oarecum timp, mai ales prima încercare, dar acel timp se-ntoarce repede. După o seară de lucru, poți merge sus, comuta câteva pârghii, și sări de la niveluri mici la puterea de încântare plină într-o scurtă sesiune.
FAQs
Cât Timp Iei Pentru A Construi O Fermă XP Automată De La Început La Sfârșit?
Pentru Ferma Portal Nether cu Aur și XP, așteaptă în jur de două până la trei ore de la primul bloc la test final. Ferma XP Spawner de Infestare este de obicei în jur de unu până doi ore. Construcțiile mai târzii merg mai repede pe măsură ce înveți modelele.
Aceste Ferme XP Funcționează Pe Ambele Ediții Java și Bedrock?
Aceste design-uri specifice sunt scrise pentru Ediția Bedrock. Ucigașul cu trident este un truc Bedrock unde tridentul mutat de piston numără în continuare ca lovitură de jucător. Jucătorii Java folosesc de obicei alte design-uri cum ar fi ferme de Endermen sau ferme de păzitori pentru XP greu.
Cât XP Pot Cu Realism Să Câștig Pe Oră Cu Aceste Ferme?
- Un singur modul de portal: aproximativ 15-20 niveluri pe oră
- Un bine setup Spawner de Infestare fermă XP: poate atinge 30-60 niveluri pe oră
Care Este Diferența Dintre Un Ucigaș Cu Trident Și Uciderea Manuală A Mobilor?
Uciderea manuală înseamnă că rănești mobii cu daună de cădere și apoi-i termini tu. Un ucigaș cu trident folosește pistoni pentru a-și împinge un trident aruncat prin mobii în timp ce pur și simplu stai pe lângă. Deoarece jocul leagă acel trident de tine, numără în continuare ca lovitură a ta și dă XP și beneficiile Looting în timp ce stai AFK.
Pot Construi Aceste Ferme Pe Un Server Multiplayer?
Da, dar mai întâi verifică regulile serverului. Multe servere pun limite pe număruri de mobs, ceasuri Redstone, și farming AFK lung. Construiește într-o zonă protejată deci alți jucători nu pot să-ți sparacă Redstone-ul sau să-ți fure dropurile.
Lead writer at minecraft.how. Long-time Minecraft player running a small SMP server, testing every build, mod, and seed before writing about it.